Python Starter Kit Set
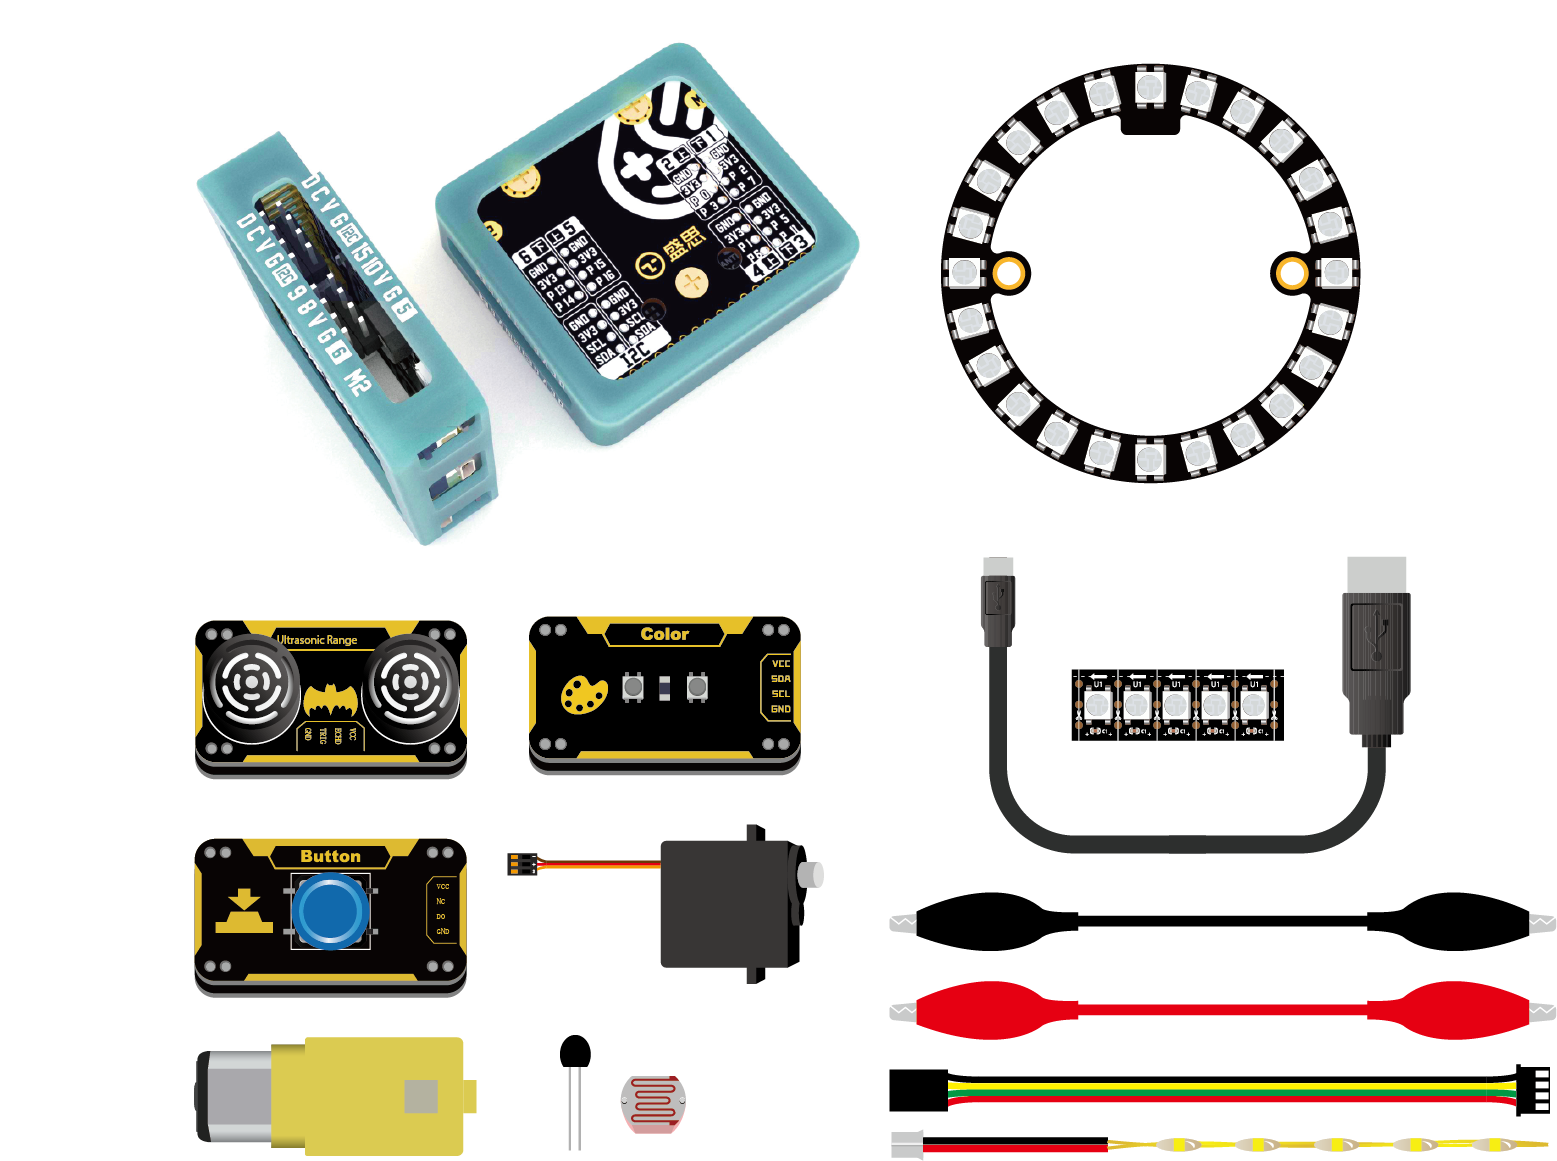
Python Starter Kit consist of mPython Board, mPython Expansion Board, RGB Halo Light,DC Motor,Rainbow LED Light and Labplus blue:bit Smart Sensors Modules (Ultrasonic, Color & Button). An ideal starter kit for Python Programming learning and DIY creation. Tutorial for basic application and programming of this starter kit. Kit set included:
mPython Expansion Board
Please refer to Expansion Board Tutorials,for its’ application details.
It supports 2-way PWM motor drive for use of DC motor and also Rainbow LED Light.
import parrot                           # import parrot module

parrot.led_on(parrot.MOTOR_1,50)        # set brightness at 50%
RGB Halo Light
24x ws2812 LEDs uniformly arranged into a ring plate with an outer diameter of 71mm. Connected in series that require only 1 pin to communicate as the WS2811 driver were integrated in the LED. These LED has a constant 18 mA current drive, so even if the voltage varies, the color will be very consistent. .. figure:: /../images/extboard/pixelRing.png
align: center width: 250 The WS2812 LED arranged in clockwise as 0~23
For use of neopixel refers to:ref:RGB LED-external strip light<neopixel_strip> chapter and neopixel module.
Other than neopixel module, mPython Board also provide ledstrip module (neopixel enhance version),Packaed with multiple display effects and it is easy to use.
To begin, copy ledstrip.py to mPython Board:
from ledstrip import *                      # import ledstrip
from machine import Pin                     # import Pin to machine

strip=LedStrip(pin=Pin.P15,n=24,brightness=0.5)     # sample LedStrip, Pin P15,Led qty 24,Brightness 50%

# List of different effects
print("rainbow")
strip.rainbow()
print("rainbow_cycle")
strip.rainbow_cycle()
print("cycle")
strip.cycle((50,50,50))
print("bounce")
strip.bounce((0,0,50))
strip.clear()
print("colorWipe")
strip.colorWipe((0,50,0))
print("theaterChase")
strip.theaterChase((50,0,0))
print("theaterChaseRainbow")
strip.theaterChaseRainbow(wait=5)
print("cylonBounce")
strip.cylonBounce((0,0,50),4,10,50)
print("runningLight")
strip.runningLight((50,50,0),20)

print("meteorRain")
for i in  range(5):
    strip.meteorRain((100,100,100),8,60,True,20)
blue:bit module
For the basic application of Blue:bit modules, see Wiki for details. For a description of the blue: bit module, please refer to the: Mod: ‘bluebit’ module API guide.
- bluebit set Wiki:http://wiki.labplus.cn/index.php?title=Bluebit
Button Module
Connect Do of Button Module to mPython Board P5 ;and its’ VCC 、GND connect to 3.3V 、GND respectively:
from mpython import *           # import mpython module

p5=MPythonPin(5,PinMode.IN)     # instantiate MPythonPin, button module pin a (P5) set as "PinMode.IN" mode

while True:
    value=p5.read_digital()      # Read the digital input of pin P5
    oled.DispChar("Button:%d" %value,30,20)   # Display the read value on the OLED
    oled.show()                                  # Refresh
    oled.fill(0)                                 # Clear screen
The Button module when pressed, Do to output high level, and vice versa. 按键模块,当按键按下Do输出高电平,For the digital input of the control board pin, refers to pin-digital input chapter。
Ultrasonic Sensor Module
Connect the TRIG、ECHO of the Ultrasonic module to the SCL 、SDA of the mPython Expansion Board ;and VCC 、GND to 3.3V 、GND respectively
from bluebit import *               # import bluebit
from mpython import *               # Import mpython

ultr=Ultrasonic()                   # instantiate Ultrasonic array

while True:
    data=ultr.distance()                    # Read the ultrasonic distance measurement value
    oled.DispChar("ultrasonic:%d" %data,30,20)  # oled display data
    oled.show()                             # Refresh
    oled.fill(0)                            # Clear screen
Color Sensor Module
Connect the SCL、SDA to the Color Module to the SCL 、SDA of the mPython Expansion Board ;and VCC 、GND to 3.3V 、GND respectively:
from bluebit import *               # import bluebit
from mpython import *               # import mpython

color=Color()                       # instantiate Color array

while True:
    c=color.getRGB()                # Get RGB value of color, back to (r,g,b) array
    oled.DispChar("R:%d,G:%d,B:%d" %(c[0],c[1],c[2]),10,20)   # oled display data
    print(c)                                                # print RGB value
    oled.show()                                             # Refresh
    oled.fill(0)                                            # Clear screen
    sleep_ms(500)                                           # Delay
When Color Sensor operate,LED will emit RGB color light. Locate the object about 1cm away from the color sensor, Color Sensor measure the color based on the color light reflected back from the object.
Pay attention and avoid measurement error due to ambient light factors, as it has an effect on the Color Sensor. getRGB() is to getting Color of the object measured OR to use getHSV() to get the HSV color value of the object measured.
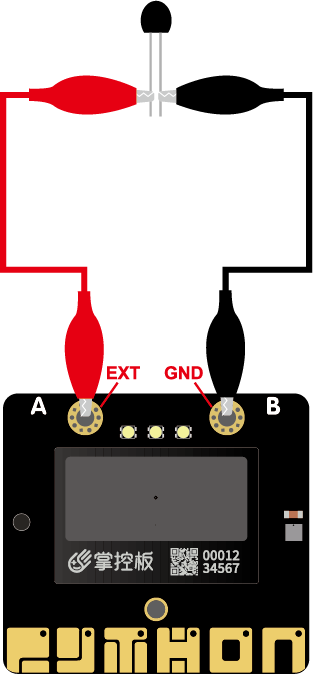
Photoresistor/Thermistor
Both was resistive are of resistive elements, the resistance changes with the light and heat of the environment. Therefore, we can sense the change of external environment by measuring the voltage change due to its’ resistance changes!
Use Alligator clip to connect external resistive component (such as photoresistor, thermistor) to the EXT and GND of the mPython Board solder pad via alligator clip. Read the analog input of P3 pin:
from mpython import *           # import mpython module

    p3=MPythonPin(3,PinMode.ANALOG)     # instantiate MPythonPin, set P3 as "PinMode.ANALOG" mode
    while True:
        value=p3.read_analog()          # Read the analog value of ext (P3)
        oled.DispChar("analog:%d" %value,30,20)
        oled.show()
        oled.fill(0)
Hint
For application of the analog input of mPython Board in details, refers to Pin-Analog input chapter.
Servomotor
Detailed tutorial on steering gear driven by mPython Board, refers to servo tutorial chapter。