10.2. MQTT protocol: 2 upload data points to OneNET platform
In the previous tutorial, we learned about to use the MQTT protocol to access the OneNET platform, and at the same time obtain the commands issued by the platform to achieve the function of remote control. If you have not been come into contact MQTT protocol and OneNET platform, it is recommended to check the tutorial in the previous chapter first.
This tutorial is to practise to create a new data stream on the OneNET platform and upload data points using the publish message format in the MQTT protocol.
10.2.1. New data flow on OneNET platform
OneNET platform official website address:https://open.iot.10086.cn/. If you have not used the platform, you can refer to the tutorial in the previous chapter to add products and equipment first.
Before reporting data points, we need to add a data flow template on the OneNET cloud platform. Proceed as follows:
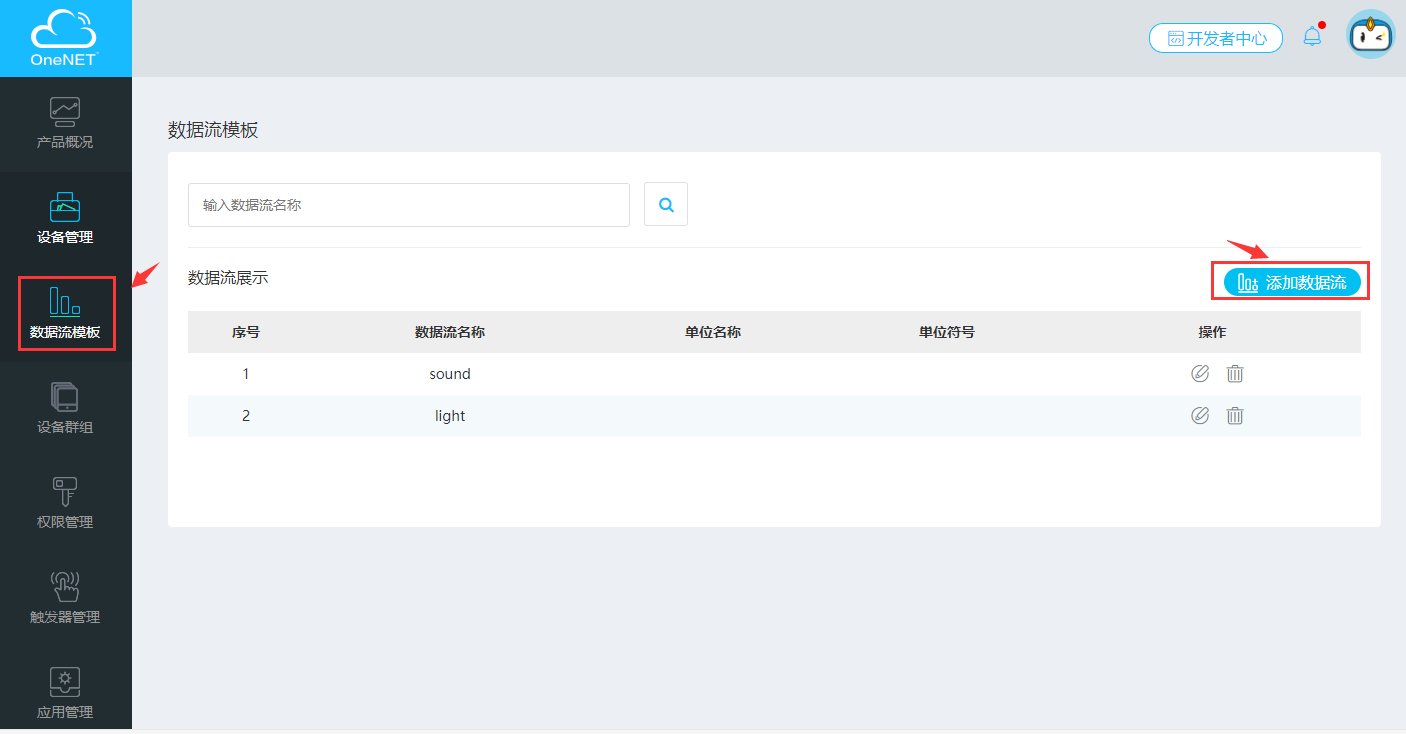
1、Go to the [Device Management] page of [Developer Center], select [Data Flow Template] in the left menu bar, and click [Add Data Flow].
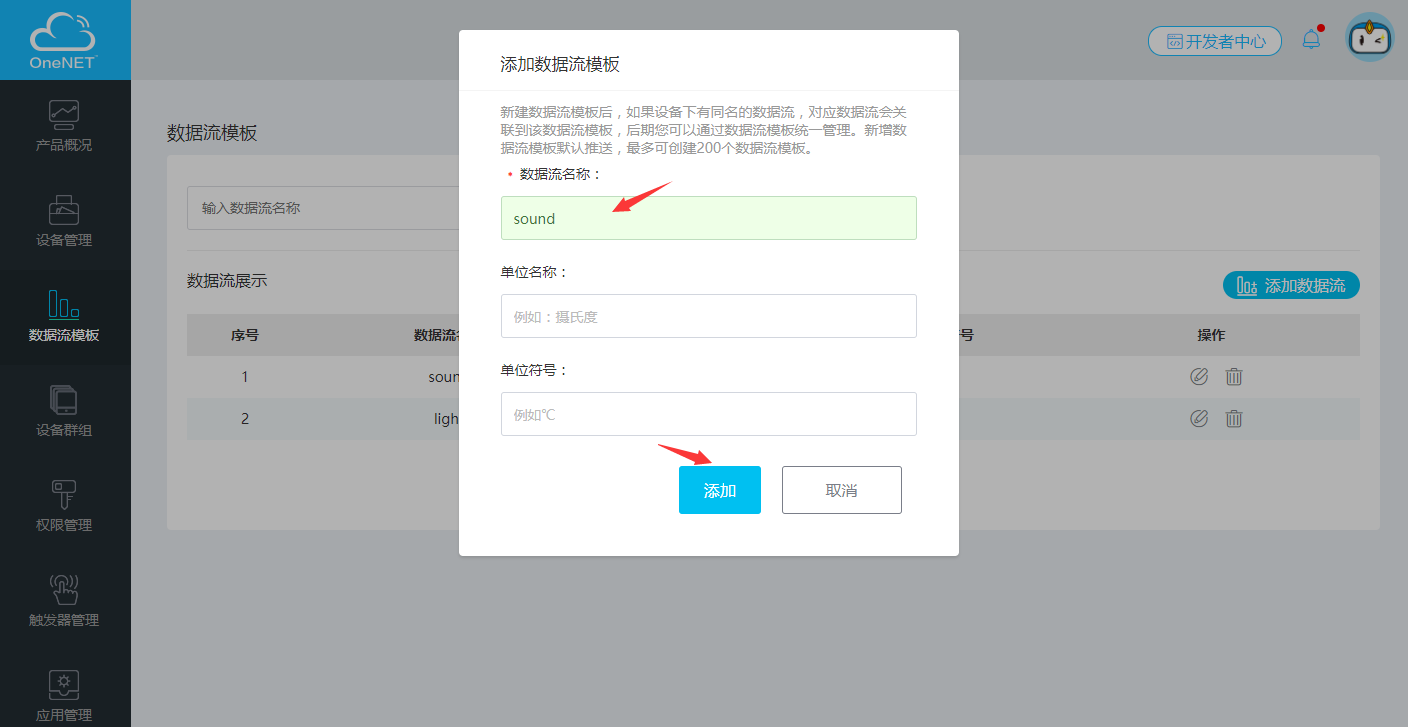
2、A dialog box for adding a data stream will pop up, the name of the required item, other can be optional, after completing, click [ADD].
3、Upon added, the dialog box will close. The data flow display list will automatically add the newly added data flow information.
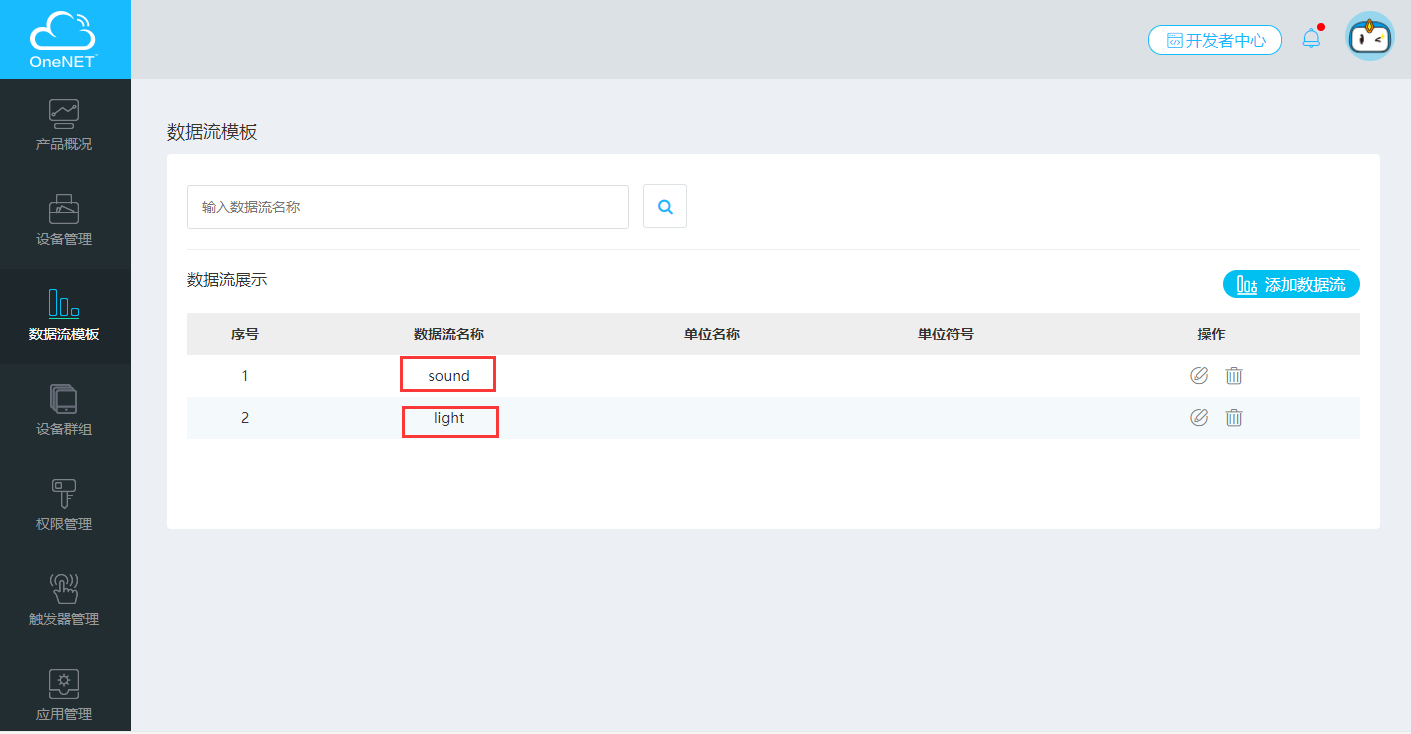
As of this example, need to add two data streams, sound and light, as shown above.
10.2.2. Upload data points to OneNET platform
10.2.2.1. OneNET data point reporting format
When transferring data points, download and refer to the protocol rules from OnetNET platform documentation center, OnetNET Platform Document Center Address:https://open.iot.10086.cn/doc/art431.html#118。 Find [1.1 documentation] to find and download the device terminal access protocol-MQTT in the MQTT project. After opening, find [5.2 News Release]-[5.2.1 Data Point Report]。
The data point reporting format is as follows:
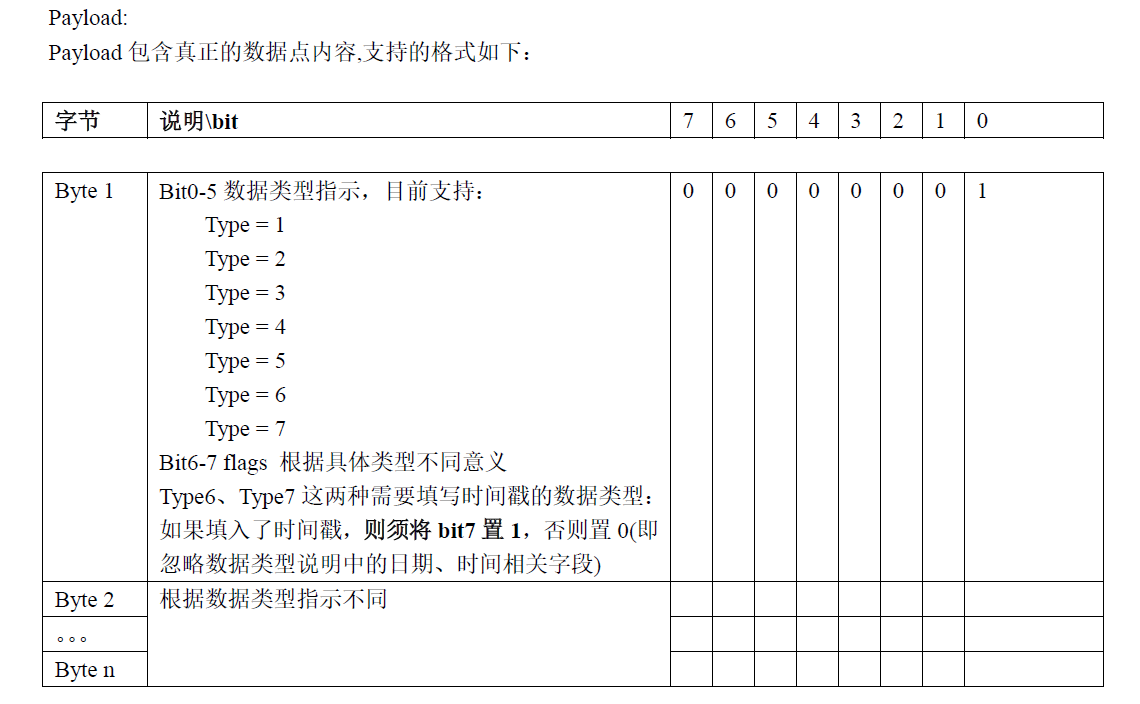
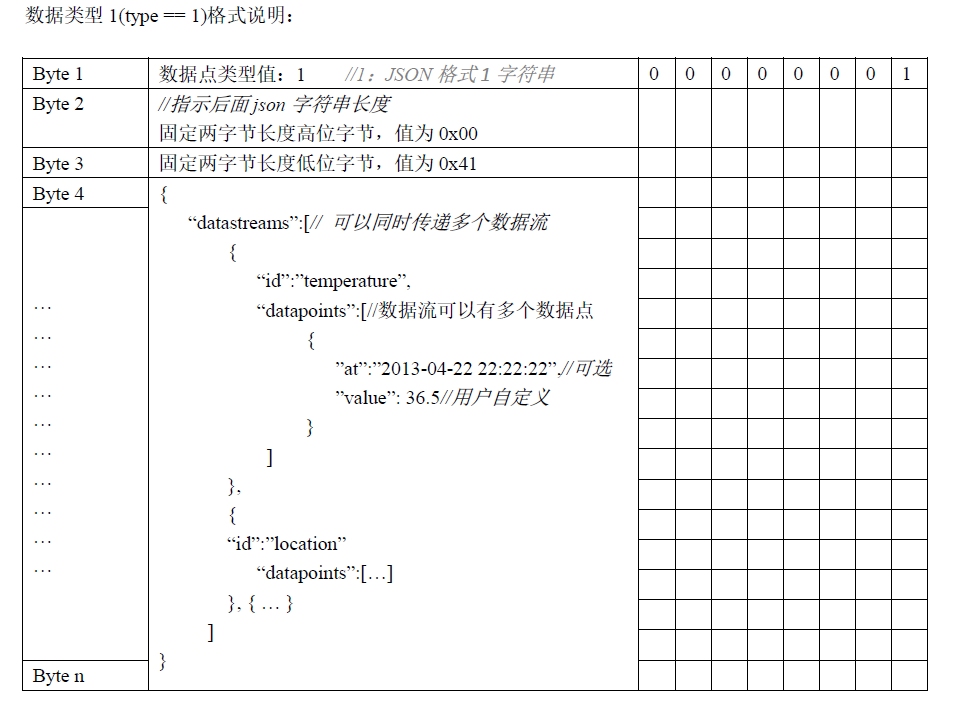
The example uses the JSON format of data type 1 (type == 1).
We customize a pubdata method, the function of this method is to combine into the message format required by the protocol:
def pubdata(data):
    j_d = json.dumps(data)
    j_l = len(j_d)
    arr = bytearray(j_l + 3)
    arr[0] = 1 #publish the data type is json
    arr[1] = int(j_l / 256) # json data length high byte
    arr[2] = j_l % 256      # json data length Low byte
    arr[3:] = j_d.encode('ascii') # json data
    return arr
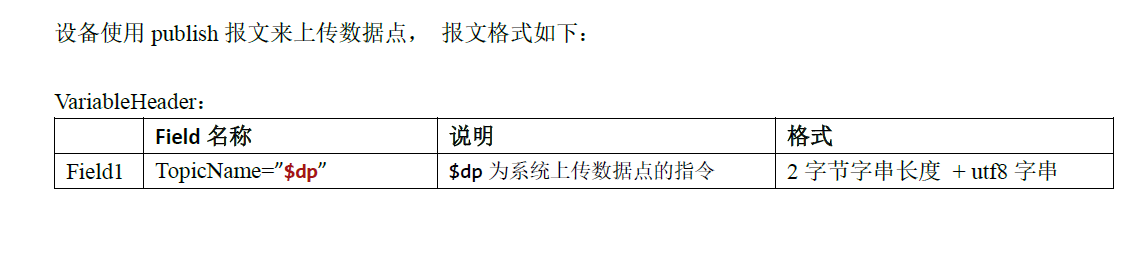
The device uses publish messages to upload data points. $dp is the instruction for the system to upload data points (2 byte string):
c.publish('$dp',pubdata(message))
Complete program example:
from umqtt.simple import MQTTClient
from mpython import *
from machine import Timer
import json
# MQTT server address domain name :183.230.40.39
SERVER = "183.230.40.39"
#Device ID
CLIENT_ID = "deviceID"
#Product ID
username='productID'
#Product APIKey:
password='APIKey'
mywifi=wifi()
message = {'datastreams':[
{
'id':'sound',
'datapoints':[{'value':0}]
},
{
'id':'light',
'datapoints':[{'value':0}]
}
]}
tim1 = Timer(1) # Create a Timer
def pubdata(data):
j_d = json.dumps(data)
j_l = len(j_d)
arr = bytearray(j_l + 3)
arr[0] = 1 #publish data type is json
arr[1] = int(j_l / 256) # json data length high byte
arr[2] = j_l % 256 # json data length low byte
arr[3:] = j_d.encode('ascii') # json data
return arr
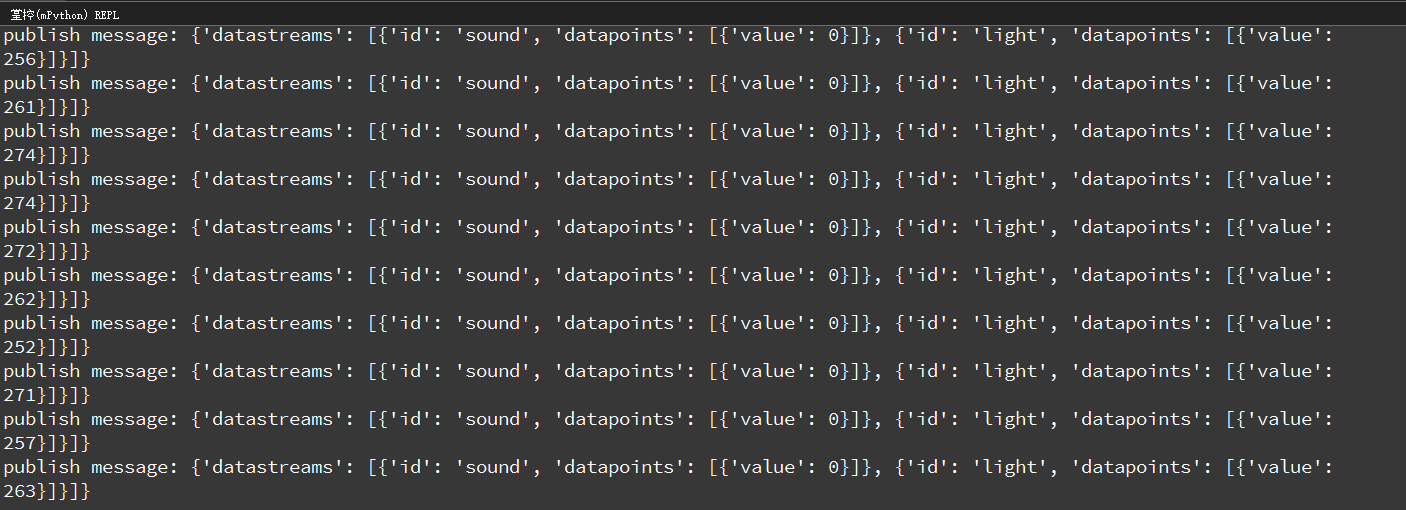
def publishSenser():
message['datastreams'][0]['datapoints'][0]['value']=sound.read()
message['datastreams'][1]['datapoints'][0]['value']=light.read()
c.publish('$dp',pubdata(message)) #publish message upload data points
print('publish message:',message)
mywifi.connectWiFi("ssid","password")
c = MQTTClient(CLIENT_ID, SERVER,6002,username,password)
c.connect()
print("Connected to %s" % SERVER)
tim1.init(period=1000, mode=Timer.PERIODIC, callback=lambda _:publishSenser()) # Upload data points every second
10.2.3. Display the effect
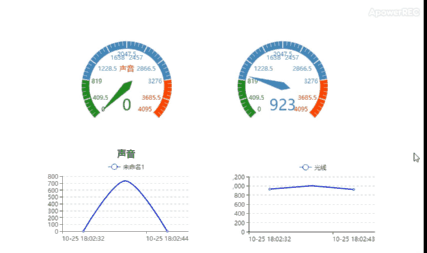
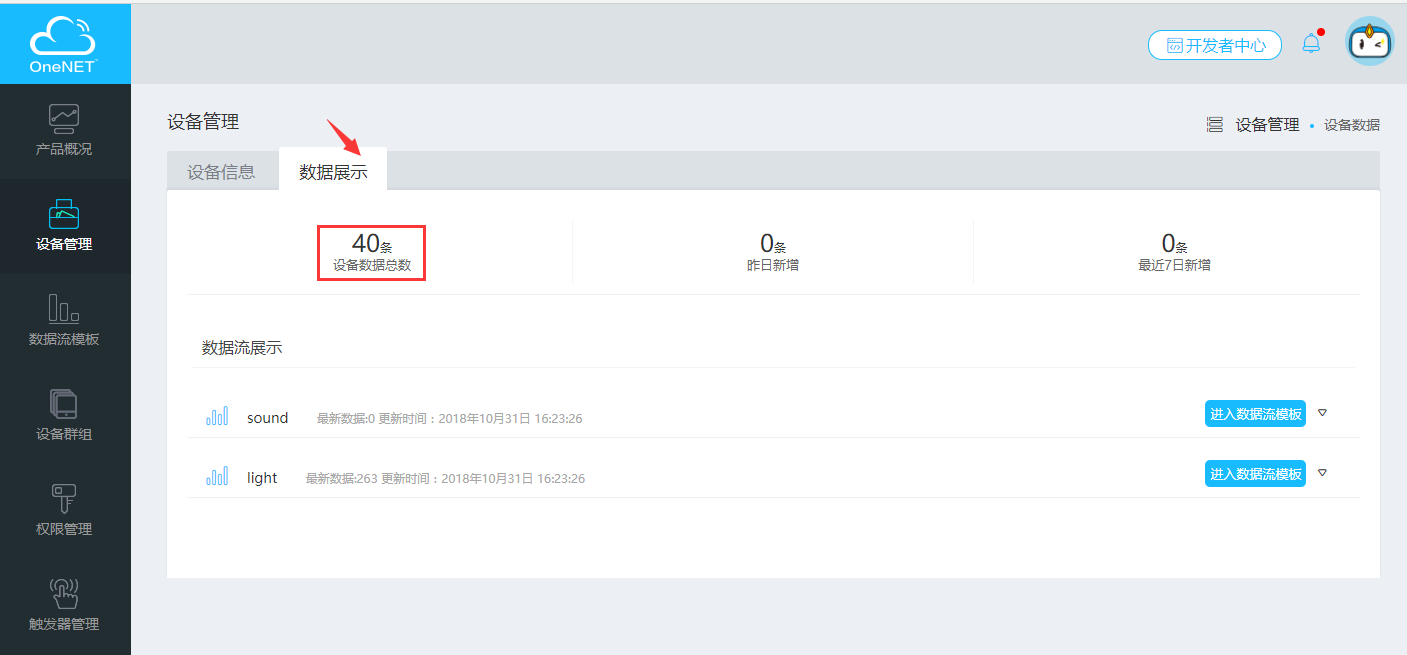
The mPython Board restarts the running program, and uploads sound and light data streams to OneNet every 1 second.
The indicator light of the device shows green, indicating that the connection is successful. Select [Display Data] to view the data stream reception status.
Create an application in [Application Management], add elements such as instrument charts or line charts in the application, and select the data flow displayed in the properties. The final effect is as follows: