7. Picoboard-Scratch
The mPython Board can simulate SCRATCH to use on the PicoBoard. Use of mPython Board to simulate PicoBoard SCRATCH programming, first to establishes the connection between the mPython Board and Scratch, then program flashed into the mPython Board.
7.1. Flashed the program
# mPython Board simulation Scratch PicoBoard
#------------------------------------------------------
# Channel | PicoBoard | mPython |
#------------------------------------------------------
# 4 | resistance-A | press of the "A" button |
# 2 | resistance-B | accelerometer's x |
# 1 | resistance-C | accelerometer's y |
# 0 | resistance-D | ext |
# 3 | button | press of the "B" button |
# 5 | light | light |
# 6 | Sound | Sound |
# 7 | Slider | TouchPad |
# -----------------------------------------------------
# Instructions:Normal startup enters scratch mode by default;Back to REPL mode, after pressing Reset Button and Button B at the same time,
# Release the Reset Button for 2 seconds and then release Button B
from mpython import *
from machine import UART
from machine import Pin,ADC
scratchMode=True
ext = MPythonPin(3,PinMode.ANALOG)
#48*48
scratchlogo= bytearray([
0X00,0X00,0X00,0X00,0X00,0X00,0X00,0X00,0X00,0X00,0X00,0X00,0X00,0X00,0X00,0X00,
0X00,0X00,0X00,0X00,0X00,0X00,0X00,0X00,0X00,0X00,0X00,0X00,0X00,0X00,0X00,0X00,
0X00,0X00,0X00,0X00,0X00,0X00,0X00,0X00,0X00,0X00,0X00,0X00,0X00,0X02,0X00,0X00,
0X00,0X80,0X00,0X06,0X00,0X00,0X00,0XE0,0X00,0X0E,0X00,0X00,0X00,0XF0,0X00,0X1B,
0X00,0X00,0X00,0X5C,0X00,0X33,0X00,0X00,0X00,0X46,0X7F,0XFD,0X00,0X00,0X00,0X5B,
0XC0,0X7D,0X80,0X00,0X00,0X5C,0XFF,0XFB,0X80,0X00,0X00,0X5F,0X7F,0XF7,0XC0,0X00,
0X00,0X5E,0X4F,0XE8,0X60,0X00,0X00,0X7D,0XF3,0XF8,0X30,0X00,0X00,0X6B,0X1D,0XF8,
0X18,0X00,0X00,0X76,0X05,0XF8,0X0C,0X00,0X00,0XD4,0X02,0XE8,0X0C,0X00,0X00,0XB4,
0X03,0XEC,0X0E,0X00,0X01,0XB4,0X01,0X74,0X6E,0X00,0X01,0X7E,0X11,0X76,0X0A,0X00,
0X01,0X7A,0X11,0X03,0X01,0X00,0X23,0X7B,0X01,0X7E,0X60,0X02,0X0F,0XFD,0X82,0X3F,
0X00,0X28,0X03,0X7F,0X6C,0X1E,0X00,0X30,0X03,0X7C,0X00,0X0C,0X00,0X10,0X03,0X78,
0X00,0X00,0X00,0X10,0X3B,0X78,0X05,0X00,0X00,0X10,0X01,0X78,0X00,0X30,0X00,0X3C,
0X01,0XB8,0X00,0X01,0X80,0X38,0X00,0XB8,0X00,0X00,0X20,0X38,0X00,0XDC,0X04,0X00,
0X00,0X70,0X00,0X64,0X02,0X00,0X80,0XE0,0X00,0X3A,0X01,0X01,0X01,0XE0,0X00,0X1D,
0X00,0X38,0X07,0XC0,0X00,0X0F,0X80,0X00,0X1F,0X00,0X00,0X03,0XF0,0X00,0XFE,0X00,
0X00,0X01,0XFF,0XFF,0XF8,0X00,0X00,0X00,0X3F,0XFF,0XC0,0X00,0X00,0X00,0X00,0XE0,
0X00,0X00,0X00,0X00,0X00,0X00,0X00,0X00,0X00,0X00,0X00,0X00,0X00,0X00,0X00,0X00,
0X00,0X00,0X00,0X00,0X00,0X00,0X00,0X00,0X00,0X00,0X00,0X00,0X00,0X00,0X00,0X00,
])
if button_b.value()==0: #Start detection, press Button B to enter REPL
scratchMode=False
#print('replMode')
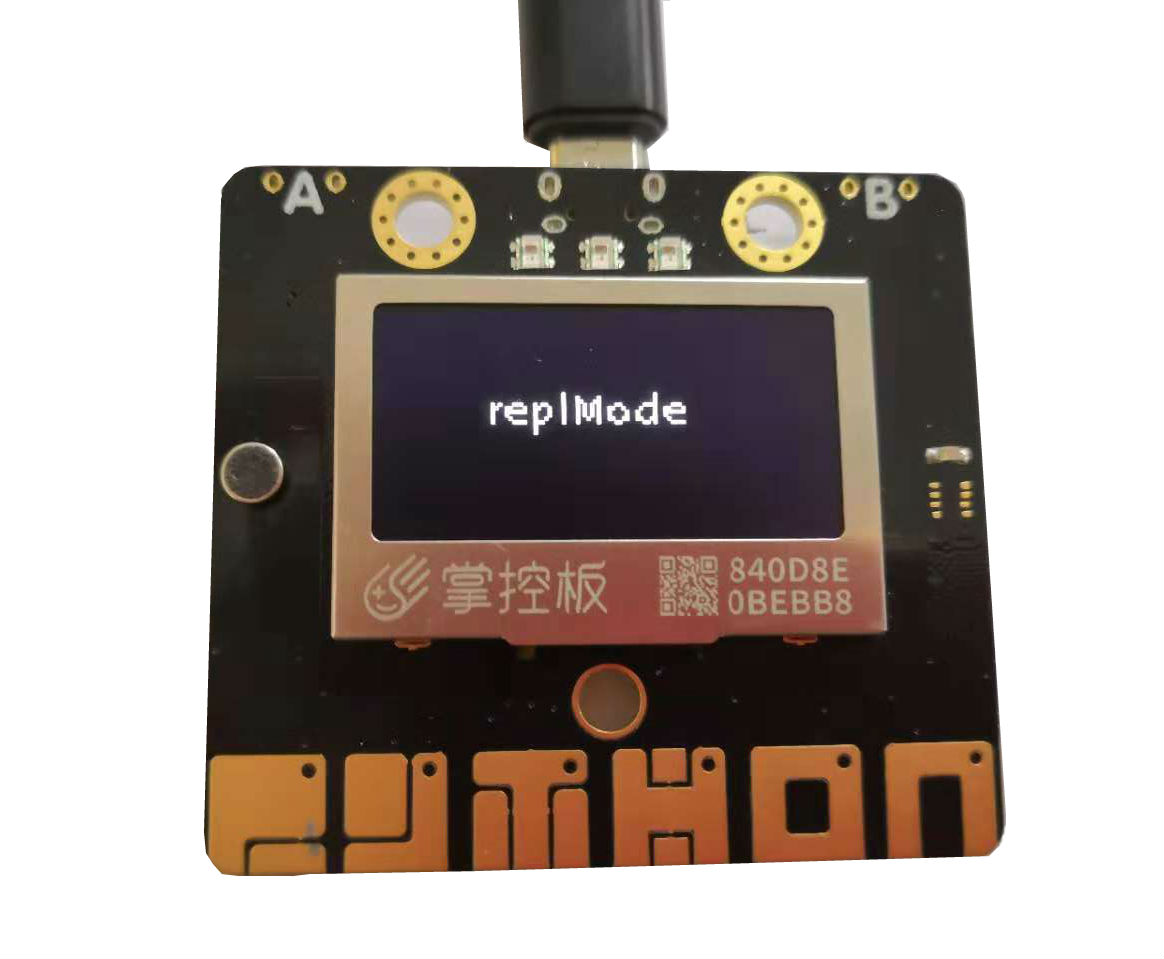
oled.DispChar('replMode',30,20)
oled.show()
# Touchpad scan
# pressed the 6 touchpads, SCRATCH feedback 10, 20, 30, 40, 50, 60 respectively
def ScanTouchpad():
if touchPad_P.read() <200:
return int(1023/10)
elif touchPad_Y.read()<200:
return int(1023/10*2)
elif touchPad_T.read()<200:
return int(1023/10*3)
elif touchPad_H.read()<200:
return int(1023/10*4)
elif touchPad_O.read()<200:
return int(1023/10*5)
elif touchPad_N.read()<200:
return int(1023/10*6)
else:
return 0
while scratchMode:
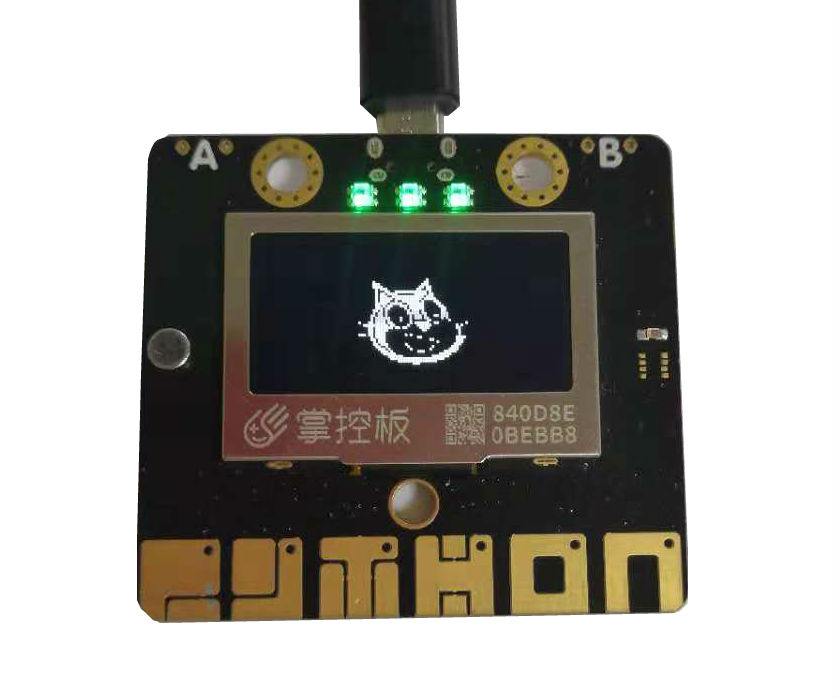
oled.bitmap(40,10,scratchlogo,48,48,1)
oled.show()
uart = UART(1, 38400, rx=3, tx=1)
# Create and send Scratch data packet
def convert(a, b):
sensor = bytearray(2)
upper = (b & 0x380) >> 7
sensor[1] = b & 0x7f
sensor[0] = (1 << 7) | a << 3 | upper
uart.write(sensor)
request = bytearray(1)
while True:
if uart.readinto(request) == 1 and request[0] == 0x01: #When receiving the 0x01 byte sent from SCRATCH
rgb.fill((0,20,0))
rgb.write()
convert(15, 0x04)
sleep_us(10)
extValue=int(ext.read_analog()/4) # Get ext
convert(0,extValue)
reading = accelerometer.get_y()*1000 # Get accelerometer's y
if reading >= 0:
reading = int(reading / 2) + 512
convert(1, reading)
else:
reading = 512 - abs(int(reading / 2))
convert(1, reading)
reading = accelerometer.get_x()*1000 # Get accelerometer's x
if reading >= 0:
reading = int(reading / 2) + 512
convert(2, reading)
else:
reading = 512 - abs(int(reading / 2))
convert(2, reading)
if button_b.value()==0: # Get button B state
convert(3, 0)
else:
convert(3, 1023)
if button_a.value()==0: # Get button A state
convert(4, 1023)
else:
convert(4, 0)
convert(5, 1023-light.read()) # Get light senser
convert(6, sound.read()) # Get Sound senser
convert(7, ScanTouchpad()) # Get TouchPad value
else:
rgb.fill((0,0,0))
rgb.write()
This program is to establish a connection between the mPython Board and SCRATCH. When the program is flashed, the mPython Board establishes contact with the Scratch PicoBoard, so that the control panel can simulate the sensors on the PicoBoard to use。 The sensors on the PicoBoard correspond one-to-one with the control board, as shown in the table below:
prompt
When the mPython Board simulates the use of PicoBoard Scratch, note that the value of the sensor of the control board has changed, for example, in mPython, the detection value range of the light sensor is between 0~4095, while in Scratch, the value range is 0~100. The method to view the sensor parameters of the mPython Board in Scratch is as follows:Under “More blocks” in the script bar, click on the corresponding block module. Use button A as example, under the two conditions of pressing and not pressing, click on the “Resistance A Sensor Value” building block. The value of unpressed is 0, and the value of pressed is 100. The same is true for other sensors.
7.2. mPython Board and Scratch connect
- 1、Flash the above program into the mPython Board and set it to run by default;
- 2、Open the Scratch software (version 2.0 is used here), Click “Add Extension” in “More Blocks” in the script bar to add “PicoBroad” hardware;
- 3、After adding “PicoBroad”, the “PicoBoard” instruction module will appear on the Scratch interface. When the yellow dot on the right side of“PicoBoard” turns green, and the three RGB lights on the control panel flash at the same time, it means the connection between the control panel and Scratch is successful;
- 4、After the connection is successful, you can do some interactive programs in Scratch.
7.4. Exit Scratch,return to REPL mode
The mPython Board cannot read files and flash programs when in SCRATCH mode. To return to mPython2 to read files or flash into the program, first the mPython Board need to exit SCRATCH mode, then enter REPL mode. Method as follows: * After pressing the reset button and button b at the same time, first release the reset button for 2 seconds, then release the button b when the word “replMode” is displayed on the OLED display, then successfully return to repl mode, as shown: